HTTP Error – 500 Internal Server Error

Description

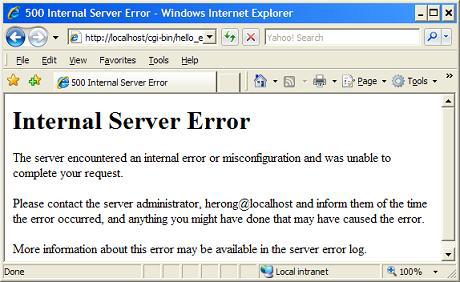
The 500 Internal Server Error is a “catch-all” server error and the server cannot be more specific about the nature of the error. The causes for a 500 error can be any number of things and about 9/10 times the error comes from a code error, which means that the problem is not necessarily the server having problems but rather the server having a problem with the coding of a web application.

Troubleshooting to Fix

Wait for one minute and try reloading. If the server does not reload the page then you will need to dig deeper to find a solution to the 500 internal server error.

TIP: Always check the error logs, you can usually find which of the following is causing the error. Look at all the logs relevant to your site. I.E. If your web application uses php then check the php error_log located in the folder of the php program. When checking the webhosting daemon error logs try and search for your ip address in order to show the daemon’s error for that webpage you are receiving the 500 internal server error.

General Guidelines

  • One or more folder does not have 755 permissions or the file that you are browsing has file permissions above 755.
  • A php.ini has some settings that are broken or entries that are not compatible with our servers.
  • You have too many processes running at the moment that it occurred. (You remembered to check the process manager, right?)
  • If you are running Perl or Python scripts the files need to have 0755 permissions as well as not have ^M characters at the end of the lines in the file, if the file was not compiled. (If the file have 0644 permissions it will give you a 500 error if it is using Perl, Python, or Ruby.)
  • Password protected directories causing issues. (You can tell it is this issue if the 500 error goes away once you remove the password protection.)
  • If you are running the maximum amount of allowed processes you will receive a 500 error. If you are using persistent mySQL connections that can cause the scripts to not die as they are supposed to.

    Remember to check the process manager if you don’t want to look in SSH how many processes are running.

    This will kill all processes for the user that are running on the ramdisk
    [bash]
    ps aux | grep `whoami` | grep ramdisk | awk ‘{ print $2 }’ | xargs -i kill -9 {};
    [/bash]
    This command will kill php processes
    [bash]
    killall -9 php php4 php5
    [/bash]

FastCGI & the temporary URL.

  • If they are using FastCGI & they are not using the domain name it will cause 500 errors. They will need to point the DNS to us to use it & also use a domain name in the URL or stop using FastCGI. Please note that Magento does not work with FastCGI turned on.
  • If you uploaded a file that is encoded as ASCII instead of binary. (Some of the encoders I’m referring to are Zend Guard, IonCube, SourceGuardian, & phpSHIELD)

.htaccess file

  • two entries on the same line of the .htaccess file that are supposed to be on one line.
  • Attempting to make changes to php settings in the .htaccess file will cause a 500 error.
  • Check for any other invalid entries in the .htaccess file it can cause the issue.

Perl or Python issues

  • If it is a file that is running Perl or Python the file needs to have 0755 permissions.
  • If the script is not compiled you can run dos2unix on the file.
    Upload the file again as binary instead if the files are compiled or have something that was encodes by a program like one of the following Zend Guard, IonCube, SourceGuardian, & phpSHIELD.
  • If the file is not compiled it needs to not have files that end with the “^M” character. The cause for the “^M” character is if they edited the file on a Windows computer & uploaded the file in binary mode.
  • Running CGI/Perl outside the cgi-bin folder. This really depends on how the webhost server is configured. Some servers allow for running CGI/Perl scripts outside the cgi-bin folder. You need to add the following line to the .htaccess file in that directory:
    [bash]
    Options ExecCGI
    [/bash]
    An additional line is often seen together with this, but should not be needed if you’re getting as far as 500 errors, as without it, the contents of the file will be served directly to the browser:
    [bash]
    AddHandler cgi-script .
    [/bash]
  • Missing the appropriate shebang. The shebang line tells Linux what interpretor to use for a script. If you do not have that line, the script will fail to execute, causing a 500 error.

    Common shebang lines:

    perl
    [perl]
    #!/usr/bin/perl
    #!/ramdisk/bin/perl
    #!/usr/bin/env perl
    [/perl]
    python
    [python]
    #!/usr/bin/python
    #!/usr/bin/python2.4
    #!/usr/bin/python2.6
    #!/ramdisk/bin/python
    #!/usr/bin/env python
    [/python]
    ruby
    [ruby]
    #!/usr/bin/ruby
    #!/ramdisk/bin/ruby
    [/ruby]

  • Make sure the syntax is correct. This can be done for perl and python through the following respectively.
    [bash]
    perl -c testing_file.cgi
    python -c testing_file2.py
    [/bash]

PHP common errors

  • Make sure the syntax is correct. Simply missing a “;” at the end of a line will cause the server to through a 500 error. Check your php code by running the following command:
    [bash]
    php -l somefile.php
    [/bash]
  • Check the error_log. This will help solve 90% of all problems by learning how to debug erroneous code.

Rails 2.0.2

Rails 2.0.2 brings a new round of things that can go wrong. Start with these first, then move onto the fixes we previously supplied for 1.2.6.
500 Internal Server Error
A common reason for this error with Rails 2.0.2 has to do with the way it wants to handle cookie session data. To confirm this is the problem, check ./config/environment.rb to see which environment is active, then check ./log/development.log or ./log/production.log as the case may be for an error such as this one (may have to scroll up a page or two from the bottom)…
[rails]
/! FAILSAFE /! Sat Feb 09 10:53:30 -0700 2008
Status: 500 Internal Server Error
A secret is required to generate an integrity hash for cookie session data. Use
config.action_controller.session = { :session_key => “_myapp_session”, :secret =>
“some secret phrase of at least 30 characters” } in config/environment.rb
[/rails]
If you too have this error, just do what it says, but don’t put it just anywhere in config/environment.rb, put it somewhere between Rails::Initializer.run do |config| and its matching end line. For example…
[rails]
Rails::Initializer.run do |config|
# Settings in config/environments/* take precedence over those specified here

# Skip frameworks you’re not going to use (only works if using vendor/rails)
# config.frameworks -= [ :action_web_service, :action_mailer ]

# Only load the plugins named here, by default all plugins in vendor/plugins are loaded
# config.plugins = %W( exception_notification ssl_requirement )

# Add additional load paths for your own custom dirs
# config.load_paths += %W( #{RAILS_ROOT}/extras )

# Force all environments to use the same logger level
# (by default production uses :info, the others :debug)
# config.log_level = :debug

# Use the database for sessions instead of the file system
# (create the session table with ‘rake db:sessions:create’)
# config.action_controller.session_store = :active_record_store

# Use SQL instead of Active Record’s schema dumper when creating the test database.
# This is necessary if your schema can’t be completely dumped by the schema dumper,
# like if you have constraints or database-specific column types
# config.active_record.schema_format = :sql

# Activate observers that should always be running
# config.active_record.observers = :cacher, :garbage_collector

# Make Active Record use UTC-base instead of local time
# config.active_record.default_timezone = :utc

# Add new inflection rules using the following format
# (all these examples are active by default):
# Inflector.inflections do |inflect|
# inflect.plural /^(ox)$/i, ‘1en’
# inflect.singular /^(ox)en/i, ‘1’
# inflect.irregular ‘person’, ‘people’
# inflect.uncountable %w( fish sheep )
# end

# See Rails::Configuration for more options
config.action_controller.session = { :session_key => “_myapp_session”, :secret => “123456789012345678901234567890” }
end
[/rails]
All You Need to Know About php.ini

Description

Most servers with php installed on them come with default settings that are used server wide. However, sometimes a program will require these php settings to be changed and instead of changing the settings for the entire server a person can overwrite the default settings for just a particular location (or domain). This is done by installing a file called php.ini in the directory where the particular php scripts are located.

Determine current php settings

One of the first things you may want to do before installing a php.ini file would be to check to see what the server’s php settings are currently. This can be done by making a simple php script like the one shown. The reasoning for this is to see if there is even a need to overwrite the php settings or if the problem is located elsewhere.
[php]
//phptest.php
<?php
phpinfo();
?>
[/php]

Implementing php.ini

Step 1: Download the example php.ini.
Step 2: Upload the php.ini file to the directory where the php scripts are located. Note: If the file is named php.ini.default please rename it to php.ini.
Step 3: Edit the settings in the php.ini file that you want to change.

Common uses for php.ini

  • Increase post and upload sizes
  • [php]
    ; Maximum size of POST data that PHP will accept.
    post_max_size = 50M

    ; Maximum allowed size for uploaded files.
    upload_max_filesize = 50M
    [/php]
    Note: To change the upload size you must change both the post_max_size and upload_max_filesize sections. The post_max_size will need to be larger than the upload_max_filesize.
    Note: Most servers don’t care what the upload size is as long as you can upload all the content within a limited number of minutes. If it takes longer than what that server allows your connection will time out and the upload will fail.

  • Increase memory available for use
  • [php]
    ;;;;;;;;;;;;;;;;;;;
    ; Resource Limits ;
    ;;;;;;;;;;;;;;;;;;;

    memory_limit = 128M ; Maximum amount of memory a script may consume (16MB)
    [/php]

  • Toggle safe mode on and off
  • [php]
    ; Safe Mode
    ;
    safe_mode = Off
    [/php]

HTTP Error – 404 Not Found

Description

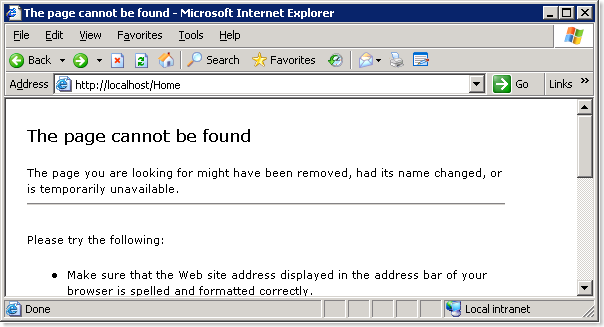
A 404 Not Found means the address cannot find a file or folder on the webhosting server or the server has not found a file matching the given URI.

Troubleshooting to Fix

  • Check the spelling for the file and URL. After the base url all the links are case sensitive according to the casing of the particular files. If a file has an uppercase and you are putting a lower case in the url the webserver will return a 404 – Not Founderror.
  • Check the nameservers and DNS information. If you have recently uploaded files and can’t seem to located them check to make sure the nameservers point to the proper location. This can be done by going to who.is and entering the domain name.
  • Make sure file exists. Another common problem is the url is requesting a file that is simply not there or has been placed in a different location on the server. Check with your webhosting company to verify that the files are in the right folder. Most webhosting platforms will have a public_html directory where all website files should be placed.

HTTP Error – 403 Forbidden

Description

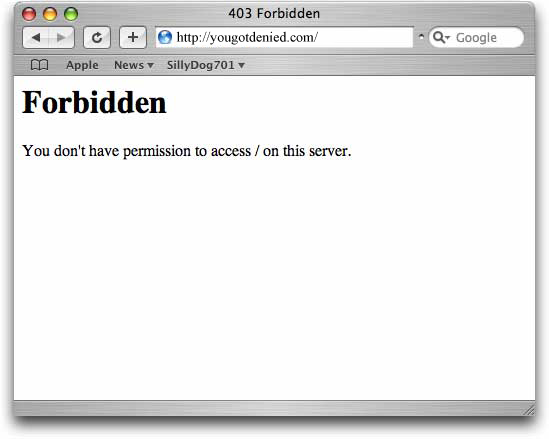
A 403 – Forbidden error means the server no longer grants you permission to view at the files being served for the website. This is usually caused by the webserver blocking the files or an endpoint is being protected by an authentication annotation or authentication middleware.

403 forbidden http error

Troubleshooting to Fix

  • Check the folders’ and files’ permissions. Sometimes after uploading files via ftp or upgrading certain scripts the permissions on the files get changed. Linux permissions should generally be set to either 644 or 755 depending on what the script requires. E.G. If a file permissions is 444, 111, etc – the server will not be able to read and execute the script properly.
    NOTE: if you cannot seem to change the permissions of a file, check the folder’s permissions above it and make sure the permissions are set properly
  • Check the .htaccess file for probable causes. There are a variety of possible causes for a 403 – Forbidden error that can occur in the .htaccess.
    1. The .htaccess might be blocking all IP addresses except a few. The code for that would look something like the following:

      [bash]
      order allow,deny
      allow from 173.254.38.123
      deny from all
      [/bash]

    2. The .htaccess may also be missing a line that says DirectoryIndex. This is particularly less common because the DirectoryIndex line is typically not needed in the .htaccess file.

      [bash]
      DirectoryIndex index.html index.cgi index.php
      [/bash]

    3. Try touching the .htaccess file.

      [bash]
      touch .htaccess
      [/bash]

  • Does the endpoint grant the right permissions. Sometimes the rest service you are requesting will return a 403 http error if the request comes from an unauthorized source. Usually a cookie or some form of an authentication token must be set. If you believe you are authenticated properly then try clearing the cache and cookies. If the problem still occurs when it should not, then check your authentication code. If you’re using angular and express then the middleware that validates your role may have some bad logic. Spring for example uses a PreAuthorize annotation that has logic that determines the user’s ability to access the endpoint.

HTTP Error – 402 Payment Required

Description

Reserved error for future use. The original intention was that this code might be used as part of some form of digital cash or micropayment scheme. This code is not usually used, however, Apple’s MobileMe service generates a 402 error (“httpStatusCode:402” in the Mac OS X Console log) if the MobileMe account is delinquent.

Troubleshooting to Fix

  • Pay Your Bills

HTTP Error – 401 Authorization Required

Description

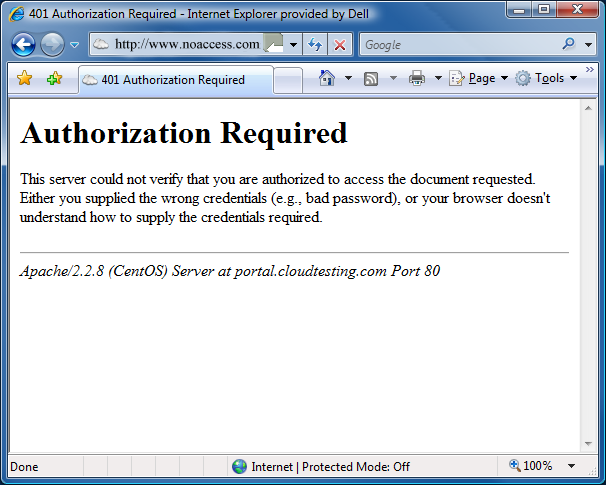
The website you are trying to access has a password protected page. A 401 – Authorization Required error usually means either you do not have not been given the right username-password combination or the basic authentication failed.
401 authorization required

Troubleshooting to Fix

  • Have you been given a username and password for this location? Usually if you have logged into a website requiring authentication the login will fail if the username or password is incorrect. Depending on the website’s backend architecture you could request a new username and password, which may reset the authentication and fix this problem.
  • Check the configuration files in the .htpasswrds. Apache has the ability to password protect directories and files through a file called .htpasswd. Most hosts will store the username and encrypted password in a separate file. The file with the right user name and password looks like the following:

    [bash]
    test:$apr1$VdWobVHD$9MCDrqDIol/vXv4qTXefG.
    [/bash]

  • Certain REST Services will return this error if you do not have the right authentication token. Often time rest endpoints will have some form of a middleware or annotation that makes an endpoint check for an authentication token. This is usually submitted with every request and stored in a cookie for the website in question. If you have problems try clearing the cache and cookies. Then login again – this should reset the expiration of the cookie and replace it if it was corrupted.

HTTP Error – 400 Bad Request

Description

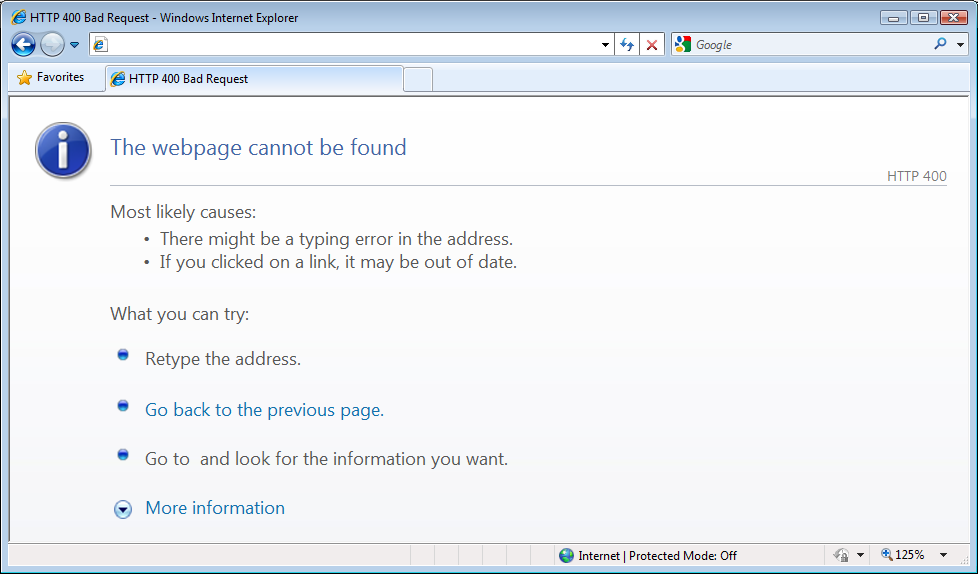
This error 400 – Bad Request simply means either there is an error in the way you tried to type the website into your browser or your browser and web server where the site is hosted are having problems communicating with each other. Most often 400 – Bad Request is due to a bad Internet connection.

Troubleshooting to Fix

  • Does this happen for other sites? If the problem occurs on multiple sites you are trying to access this indicates that the problem is on your local computer and not with the websites.
  • Are you connected to the Internet? If you tried multiple sites and they all show the same error page, check your Internet connectivity. If you are on a slow or unreliable connection this is a fairly common problem
  • Is your local computer secure? Do you keep all the security updates for the operating system up-to-date as well as keeping a good antivirus and malware scanner current on your computer. Any type of malicious software or security breeches on your computer can cause a wide variety of problems including the 400 – Bad Request error.
  • Have you installed any web based software or games? Online or web based games have great risk involved with them and have been known to cause numerous browser related issues. Try to uninstall the software, and in a worst case scenario you will have to format your computer ans start with a fresh install of the operating system.
  • Have you cleared your browser history recently? Clear your cache and cookies. Sometimes a 400 – Bad Request error can be caused by having corrupt cookies or a cached site that is incompatible with the browser. Take the necessary steps to clear the history, cache, and cookies for your browser and try reloading the website.
  • Does this error come up for the same domain name across multiple browsers? Try using Firefox, Google-Chrome, Safari, and/or Internet Explorer and see if all of them get the same error. If they all get the same error this may be due to your Internet connectivity and you will need to run a traceroute (shown in next step) to further troubleshoot the location of the problem.
  • Can you ping or run a traceroute to the server IP address? Open a command line or terminal and try running the following commands. The traceroute will show ever server you have to go through to get to the website and can show where the problem may be occurring.
    [bash]
    traceroute to zaphinath.com (173.254.38.123), 30 hops max, 40 byte packets
    1 ca-vlan999.fsl.byu.edu (10.8.122.1) 1.722 ms 1.760 ms 1.830 ms
    2 oit_uplink.fsl.byu.edu (192.168.254.5) 0.465 ms 1.007 ms 1.215 ms
    3 dc-3n604e-a-corea.dcs.byu.edu (10.3.11.1) 0.389 ms 0.493 ms 0.420 ms
    4 DC-4N204E-A-K1.dcs.byu.edu (10.33.36.37) 40.686 ms 40.662 ms 40.673 ms
    5 DC-4N219E-B-FUSFW1.dcs.byu.edu (10.33.36.2) 0.380 ms * *
    6 DC-4N221E-C-L1.dcs.byu.edu (10.33.38.1) 0.533 ms 0.537 ms 0.585 ms
    7 * DC-4N241E-F-BFW.dcs.byu.edu (10.33.38.10) 6.411 ms *
    8 dc-3n904e-a-br1.dcs.byu.edu (10.33.32.1) 0.953 ms * *
    9 ge-0-2-0–99.gw02.slkc.eli.net (70.103.246.49) 3.454 ms 3.349 ms 2.984 ms
    10 tg9-1.cr02.slkcutxd.integra.net (209.63.114.249) 4.786 ms 4.405 ms *
    11 tg9-1.ar10.oremutuw.integra.net (209.63.98.210) 6.007 ms * tg9-1.ar10.oremutuw.integra.net (209.63.98.210) 6.695 ms
    12 67.137.124.86 (67.137.124.86) 5.654 ms 6.015 ms 6.382 ms
    13 port1.ar01.prov.bluehost.com (199.58.199.114) 5.276 ms 4.789 ms 7.623 ms
    [/bash]
    This traceroute shows the servers the connection had to go through from fls.byu.edu to the web hosting platform. If your traceroute does not make it to the server you might be able to manually change the DNS settings for your computer, reconnect to the Internet, and access the site. Google’s DNS IP’s are 8.8.8.8 and 8.8.4.4.
  • Have you changed any hardware settings recently? Sometimes changing settings improperly will cause your computer to not be able to connect to the Internet. If you have changed any settings try changing them back and refresh the website you are trying to load.

HTTP Error Codes

Description

While on the internet every person has seen error codes. There are a wide variety of error codes and reasons for them. This article will simply address a list of common HTTP error codes and link to subsequent articles with more details about the error codes, common causes, and how to fix the reason for the error. Sometimes HTTP error codes are called Apache error codes.

List of Codes

Simply click on the link below to learn what the error means and how to go about troubleshooting the error.

Browse To Your New Hosting Platform Without Changing Nameservers

Description

Sometimes people will sign up with a new web hosting service and want to be able to work on the page at their new host while leaving their website active at the old host. Most web hosting companies will provide a temporary URL that will allow you to see your site, however due to the nature of the URL, which is usually http://IP_address/~username, some website material such as WordPress can not be viewed properly. This is because these website programs require the actual URL to function properly and be viewed correctly rather than simply an IP address. There is a way, however that you can make your local computer think that the domain name is pointed at your new web host so that you can view it just the way everyone else will once the domain’s nameservers are changed to point to the new server. This method will work much better than a temporary URL.

Server IP Address

You will need the IP address of the server where your website is hosted. You can either contact your webhost provider or go to www.site24x7.com/find-ip-address-of-web-site.html to find what that IP address is.

The Hosts File

In order to change the location your local computer will look for any given domain name is in a file called hosts. This tutorial will first show what changes are needed to make to the hosts file to accomplish our goal and then show exactly how to edit the hosts file for either a Linux based system or Windows. Once the file is open near the end just add the IP address of the new server and domain name you want your computer to think is at that server.
[bash]
127.0.0.1 localhost
#Add IP address and domain name after the localhost line.
173.254.38.123 zaphinath.com
173.254.38.123 www.zaphinath.com
[/bash]
Now anytime I want to go to zaphinath.com my browser will send me to 173.254.38.123 as the IP address of this site.

Mac or Linux

  • Edit /etc/hosts and add the ip address of the server you want to edit the site for and the domain name you want to use to access.
  • Note 1: you will need sudo privileges to edit this file.
  • Note 2: you can use any plain text editor you like to open the file /etc/hosts.

Windows

  • Step 1: Open your Windows start menu, search for the notepad application and then right click the notepad icon.
  • Step 2: Choose “Run as administrator” and then, while using notepad, browse to folder (/windows/system32/drivers/etc) that contains the hosts file.
  • Note 1: If the file doesn’t allow you to edit it, or whenever you save the hosts file it saves as a text file instead; you will need to right click and check the preferences for the file to make sure the read-only option is turned off.

How To Update a Joomla Password Through MySQL

Description

Joomla is a very popular CMS that most webhosts will provide for their customers. This tutorial is designed to be a nice, simple, easy to use visual aid to help reset Joomla passwords through the Cpanel via phpMyAdmin. Since most webhost companies do not support the changing of third party software data, this howto guide should help reseting a Joomla user password.

phpMyAdmin

Step 1: Find the Right Database

Browse to the right directory for your Joomla instaliation and Open configuration.php in any text editor. We do this so we can find the right database name associated with the Joomla installation for which you are trying to reset the password.
[bash]
public $dbtype = ‘mysqli’;
public $host = ‘localhost’;
public $user = ‘username_jml1’;
public $password = ‘SecretPassword’;
public $db = ‘username_jml1’;
public $dbprefix = ‘jml_’;
[/bash]

Step 2: Open phpMyAdmin

  • Log into the CPanel and select phpMyAdmin.
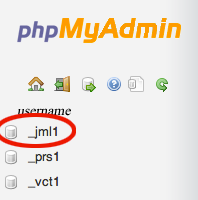
  • Select the appropriate database on the top left of the screen. The database naming schema for most hosts is username_. This is why we want to find the right database to use from step one. For the example we are using username_jml and phpMyAdmin will just show it as _jml. Select _jml
  • There will now be a list of tables in the database. Click jml_users.


Step 3: Edit the User Information

  • Click edit for the user you wish to edit.
  • Now all the information for that user should be showing and all you have to do is change the password.
  • Select MD5 for the password encryption type. MD5 is what Joomla will use by default.
  • Click GO in the bottom left corner of the user section and now the new password should be saved. You can now go to http://yourdomain.com/administrator and log in with the new credentials.